
Wood Stove Chimney System Near Me: Expert Installation, Inspection, and Maintenance Guide
Looking for a wood stove chimney system near you means thinking about safety, efficiency, and code compliance right away. You can find local suppliers and certified installers who match the right pipe, liner, and venting options to your home and local regulations—so your stove works safely and efficiently.
This post Wood Stove Chimney System Near Me walks you through how to choose the correct chimney components, what to expect from local installation, and how to schedule ongoing maintenance and inspections. You’ll learn practical steps to compare products, verify certifications, and hire qualified professionals so the whole process feels manageable and predictable.
Choosing the Right Chimney System
Choose a system that matches your stove’s output, the routing you need, and local code requirements. Materials, correct sizing, and permits determine safety, draft performance, and installation cost.
Materials and Design Options
You’ll pick between Class A manufactured chimneys and double-wall stove pipe for the run between stove and roof or wall exit. Class A chimneys handle high flue temperatures and exterior exposures; they have an insulated, multi-layer construction and are rated for masonry-clearance reductions where permitted. Use double-wall stove pipe (typically 6″ or 7″) for the connector between the stove outlet and the first chimney section; it resists corrosion and reduces creosote buildup compared with single-wall pipe.
Consider stainless steel for corrosive or high-moisture environments and galvanized steel only for short, interior runs where allowed. For lateral runs through walls use listed wall-thru kits and support brackets; for roof penetrations use listed flashing, storm collars, and appropriate rise/lead flashing. Choose finishes only after confirming clearances and ratings.
Sizing for Different Wood Stove Models
Match chimney diameter to your stove’s flue collar—most freestanding stoves use 6″ or 7″ pipe. Don’t upsize beyond the manufacturer’s recommendation; excessive diameter reduces draft and increases creosote risk. If your stove lists a 6″ collar, use 6″ pipe throughout the connector and transition to the same diameter Class A chimney unless the manual specifies a transition.
Height matters: install at least 15 feet of vertical rise from the stove outlet to the chimney cap when possible, including connector and chimney sections, to establish reliable draft. Follow stove manual for maximum horizontal offsets—keep horizontal runs short and sloped upward 1/4″ per foot toward the chimney to avoid pooling smoke. If you have an insert or high-BTU appliance, consult the manufacturer for exact sizing.
Safety Compliance and Local Building Codes
You must follow local building codes, manufacturer installation instructions, and NFPA 211 (where adopted). Obtain required permits before installation; inspections typically check clearances, support, flashing, and termination height. Document the stove model, chimney components, and clearances on the permit application to speed approval.
Maintain listed clearances between chimney surfaces and combustibles; use listed heat shields only as specified to legally reduce clearances. Verify chimney termination height relative to roof ridges, nearby walls, and adjacent structures to meet draft and ember-clearance rules. If you’re unsure, hire a certified chimney sweep or licensed installer to ensure compliance and pass inspection.
Local Installation and Maintenance Services
You get precise installation steps, code compliance, and ongoing care options from local specialists. Expect detailed quotes, certified inspections, and scheduled cleanings to keep your system safe and efficient.
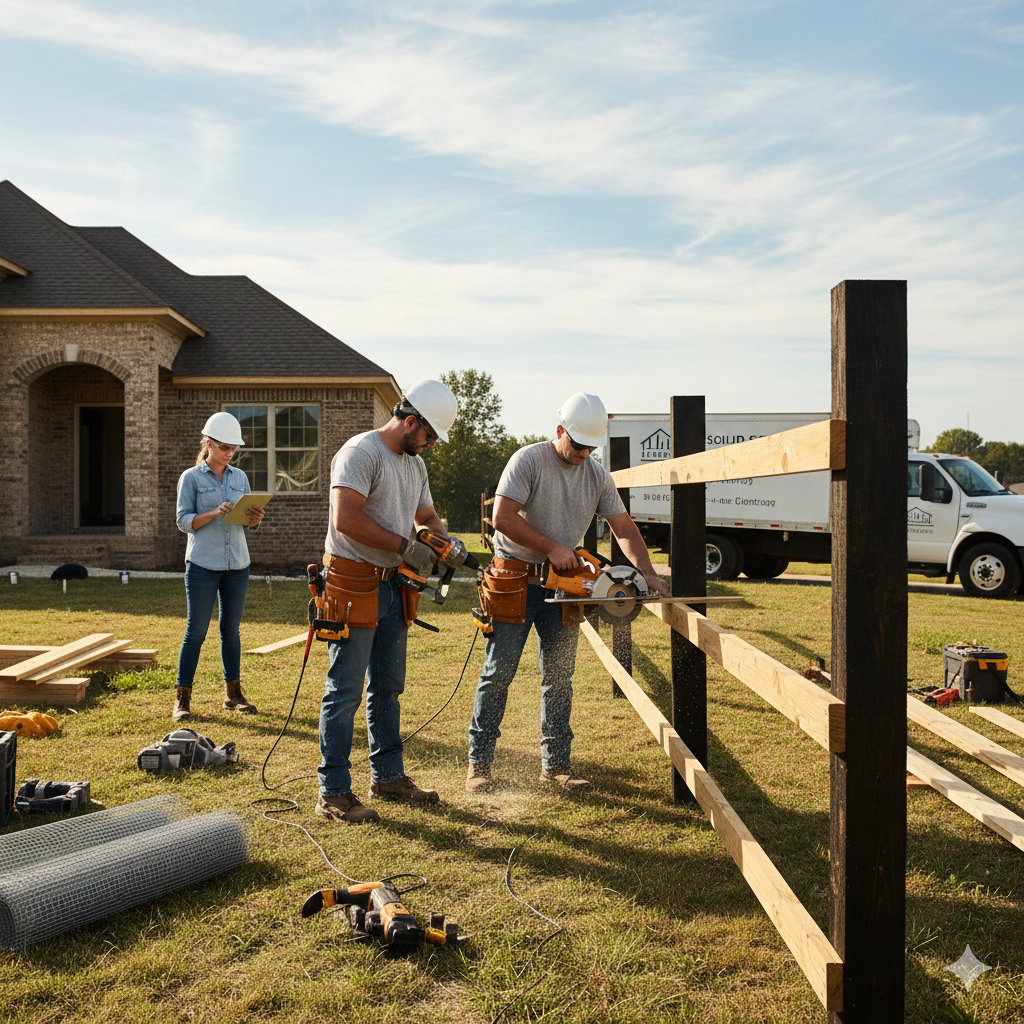
Professional Chimney Installation Process
Local installers start with an on-site assessment of your home’s structure, roof pitch, and flue routing to determine the best chimney type and liner size for your wood stove. They verify clearances to combustibles, foundation support, and roof penetration plans before giving a written estimate.
Technicians install the chimney using certified components (stainless liners, cap, flashings) and follow local building codes and manufacturer instructions. You should receive documentation of materials, a WETT or equivalent inspection when required, and a final compliance sign-off. Ask for warranty terms and a checklist that shows draft testing, smoke containment checks, and stove connection details.
Ongoing Inspection and Cleaning Programs
Schedule annual sweeping and a formal inspection after heavy use seasons or if you change fuel types. Technicians inspect liner integrity, creosote buildup, mortar joints, caps, and chimney termination to identify blockages, corrosion, or animal entry.
Many local providers offer tiered maintenance plans: single annual sweep, biannual service with minor repairs, or comprehensive plans including chimney cap replacement and stainless liner relining. Keep service records, receipts, and inspection reports; these documents support warranty claims and help you track when a full relining or masonry repair becomes necessary.